How to make a minecraft server mac

James Sullivan
Published May 04, 2026
Click the Apple menu on the server Mac and select “System Preferences.” Click the “Network” option and then select your active connection. Note the “IP Address” line.
There are other answers below:
How to make a FREE Minecraft server (Mac) UPDATED 2021! If playback doesn’t begin shortly, try restarting your device. Videos you watch may be added to the TV’s watch history and influence TV …
By setting up a Minecraft server on your Mac computer, you‘ll be able to connect to it from any other computer on the same network. With a few tweaks to your network settings, you‘ll be able to connect to it from anywhere in the world as well.
There’s three parts to this hint. 1) creating the launchDaemon that starts the minecraft server. 2) how to turn it on and off. 3) maintaining backups. The first step is to download the minecraft server jar file from the Mojang website.
While there will be minor differences depending on if you are making your Minecraft server on Windows, Mac, or Linux, these are the basic steps you will need to complete: Step 1: Download latest version of Java. Step 2: Choose file location for Minecraft server folders. Step 3: Download and run Minecraft server software.
Manual Setup [Mac + Windows] 1) Download and Install LogMeIn Hamachi Unmanaged Version 2) Open “LogMeIn Hamachi” 3) Press “Network” tab and Press “Create a New Network” 4) Create a “User ID” and “Password” and Click “Create” 5) After all that, turn On the “Power Button.” Your Server IP will be the IP next to the “Power Button” [Example: 5.205.364.134]
Go to this website and download the minecraft_server.1.XX.X.jar file (The X’s will be the current version number) After you have downloaded it, make a folder on your desktop to keep all your server files in. You can name it “Minecraft Server”. Drag over or copy and paste the .jar file into the Minecraft Server folder.
Type press the windows key + R to open a new run window. Type “ cmd ” in this window and hit enter. A command prompt window should open. In this command prompt, type “ ipconfig ” and click enter….
For Multiplayer Servers [Mac + Windows] 1) Open you Minecraft Server Folder. 2) Drag any Save File you want to Play with into the Folder. 3) After that open your “server.properties” File. 4) Edit the “level-name=” Line to “level-name=’Name of Your Save'” [No Spaces] 5) Turn On your Server and Enjoy!!! Tags Minecraft Tutorial Multi Player Add
Related Questions
How to make a Minecraft server on MacBook Air?
How to Make a Minecraft Server on a Mac. 1. Download the Minecraft Server files. To set up a server, you’ll need some files from the Minecraft website: 2. Create a new folder for the server files. This will be the folder for your server program. You can place it somewhere easy to access, such as on …
How to make a Minecraft server on Windows?
How to make a Minecraft server on Windows, Mac, or Linux 1 Install the latest version of Java. 2 Install the latest version of the Minecraft server software. 3 Configure your server & network. 4 Start the server. 5 Check that your server is accessible. Setting up a server takes some effort. You need a bit of technical know-how to… More …
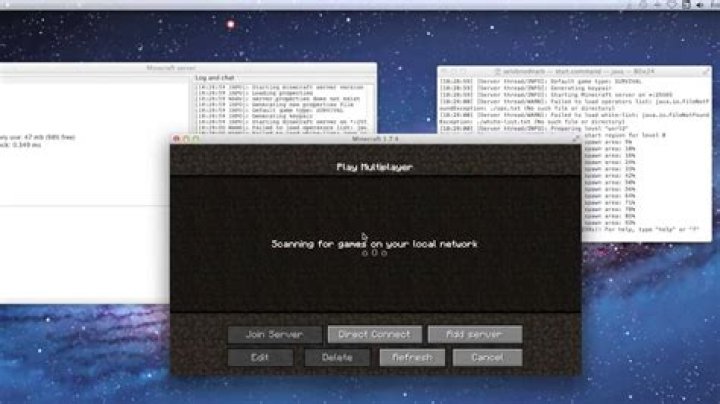
How do I set up a server on a Mac?
Click the Apple menu on the server Mac and select “System Preferences.” Click the “Network” option and then select your active connection. Note the “IP Address” line. Open your router’s configuration page. In order for others to connect to your server over the internet, you’ll need to configure your router to allow incoming connections.
How do I add a save file to a Minecraft server?
1) Open you Minecraft Server Folder. 2) Drag any Save File you want to Play with into the Folder. 3) After that open your “server.properties” File. 5) Turn On your Server and Enjoy!!! Create an account or sign in to comment. Merry Christmassssssss!!!!!!!!!!! 😀 You have to select them all, right click and compress all files.